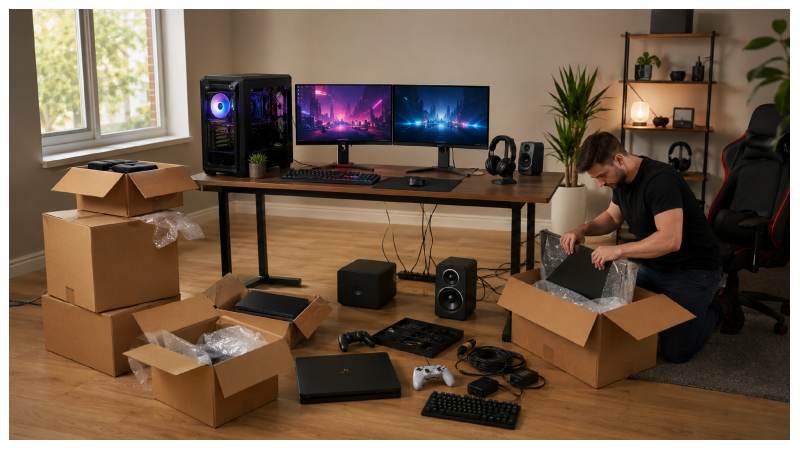
Moving to a new home can be exciting, but relocating a gaming setup requires more preparation than simply placing everything into a box. A modern gaming station may contain an expensive PC, graphics card, monitors, consoles, controllers, headsets, keyboards, external drives, cables, networking equipment, and numerous small accessories.
A careless move can result in scratched displays, damaged components, missing cables, corrupted data, or hours of frustration during reassembly. The good news is that careful planning can make the process much easier.
This EuroGamersOnline guide explains how to relocate your gaming setup while protecting your equipment, organizing your accessories, securing your data, and rebuilding your gaming environment efficiently.
Why Moving a Gaming Setup Requires Careful Planning
Gaming equipment is often sensitive to impact, pressure, moisture, static electricity, and improper handling. A desktop PC may contain heavy components mounted inside a relatively delicate case, while monitors can be especially vulnerable to pressure on their screens.
Planning also prevents another common problem: losing track of small accessories. A gaming setup can involve dozens of individual items, including HDMI cables, DisplayPort cables, power adapters, USB devices, controller batteries, dongles, and mounting hardware.
Before moving anything, create a plan covering packing, transportation, storage, and reassembly. Spending a little extra time preparing can save considerably more time and money later.
Common Risks Gamers Face During Relocation
Some of the most common risks include:
- Physical damage from impacts
- Scratched or cracked monitor screens
- Loose internal PC components
- Lost cables or adapters
- Damaged external storage devices
- Moisture and excessive heat
- Data loss
- Incorrect reassembly
Understanding these risks allows you to address them before the move begins.
Creating a Safe Moving Strategy
Divide the relocation into stages. First, document the existing setup. Next, back up important data and disconnect equipment carefully. Then pack each category separately and transport fragile components securely.
Finally, rebuild and test the setup systematically rather than reconnecting everything at once.
1. Relocate Without Losing Gaming Setup EuroGamersOnline
Protecting Your Complete Gaming Environment
The objective of Relocate Without Losing Gaming Setup EuroGamersOnline is not simply to transport your hardware from one location to another. It is about preserving the complete gaming environment.
Think of your setup as a system rather than a collection of individual devices. Your PC, displays, peripherals, networking gear, audio devices, controllers, and cables form one interconnected gaming ecosystem.
Before packing, take several photographs of the setup from different angles. These images can later serve as visual instructions when rebuilding everything.
Keeping Essential Equipment Organized
Create separate groups for:
- PC equipment
- Monitor equipment
- Console equipment
- Controllers
- Audio accessories
- Cables
- Networking devices
- Power equipment
Use clearly marked boxes or containers so similar items stay together.
Preventing Damage, Loss, and Confusion
Small accessories are particularly easy to lose. Put screws, adapters, wireless receivers, and other tiny components into labeled bags.
Keep these bags with the equipment they belong to instead of placing all small parts into one large container.
2. Planning Your Gaming Setup Move
Creating a Complete Equipment Checklist
Make a checklist before disconnecting your setup. Make sure your inventory covers every item, from essential hardware to the smallest accessories and connectors.
A typical list might include:
- Gaming PC
- Monitors
- Console
- Controllers
- Keyboard
- Mouse
- Headset
- Speakers
- Webcam
- Microphone
- External drives
- Power cables
- Video cables
- USB accessories
- Network equipment
Check items off as they are packed and again when they arrive.
Photographing Your Existing Setup
Photos provide a useful reference for cable placement, monitor positioning, and accessory locations.
Take pictures of the rear of your PC and monitors before removing cables. Close-up photographs of complicated connections can be particularly helpful.
Labeling Cables, Accessories, and Components
Use simple labels such as:
- Monitor 1
- Monitor 2
- PC power
- Console HDMI
- Router
- Speakers
Labels reduce confusion when dozens of cables are lying around during reassembly.
Choosing the Right Packing Materials
Whenever possible, use the original boxes and protective inserts that came with your equipment.
If those are unavailable, use appropriately sized sturdy boxes with protective cushioning. Keep heavy items firmly secured inside the box so they cannot shift, slide, or collide during transportation.
3. Safely Packing Your Gaming PC
Preparing the PC Before Transportation
Fully power down your computer, then unplug it from the electrical supply before handling or packing it. Give the system enough time to cool before packing it.
Remove external accessories and secure loose cables separately.
Protecting Internal Components
Internal PC components can be vulnerable to strong movement. If the computer contains a large graphics card or heavy cooling hardware, transportation should be handled particularly carefully.
Avoid placing pressure directly on ventilation openings or fragile exterior panels.
Securing the Graphics Card and Other Hardware
A large graphics card can place considerable stress on its slot if the computer is moved roughly. For longer-distance transportation, experienced PC builders may choose to remove particularly heavy components and pack them separately.
If you are unfamiliar with PC hardware, consider having a qualified technician handle component removal.
Choosing Suitable Protective Packaging
Keep the computer upright when practical and surround it with suitable cushioning. Do not use loose materials that can enter ventilation openings.
The objective is to prevent the case from shifting while also protecting it from external impacts.
4. Moving Gaming Monitors and Displays
Protecting Screens From Scratches and Pressure
Monitor panels should never have heavy objects placed against them. Wrap displays with appropriate protective material and position them so the screen is not exposed to unnecessary pressure.
Original monitor packaging is usually the safest option when available.
Packing Monitor Stands and Accessories
Remove detachable stands when possible and store their screws in a labeled bag.
Keep stand components with the corresponding monitor to simplify reconstruction.
Transporting Multiple Displays Safely
If you have several monitors, separate them with protective layers rather than allowing their screens to press against one another.
Clearly mark the box as containing fragile equipment and avoid placing heavy boxes on top.
5. Packing Consoles and Gaming Accessories
Securing Consoles and Controllers
Controllers should be packed so their joysticks and buttons are not subjected to unnecessary pressure.
Protecting Headsets, Keyboards, and Mice
Use protective packaging for fragile accessories. Gaming keyboards and mice should not be packed underneath heavy equipment.
Headsets should be positioned so their headbands and ear cups are not bent or compressed.
Organizing Chargers, Adapters, and Cables
Place power adapters and chargers in clearly labeled bags. Keeping accessories organized by device makes setup much faster.
6. Keeping Your Gaming Cables Organized
Labeling Every Cable Before Disconnecting
Labeling cables before removal is one of the simplest ways to prevent confusion.
If a cable has a specific purpose, record that purpose rather than relying only on its appearance.
Creating Separate Cable Storage Groups
Keep video cables, power cables, USB cables, and networking cables in separate groups.
Use reusable ties rather than tightly bending cables.
Making Reassembly Faster and Easier
Your photographs and labels should work together as a reconstruction guide.
Instead of trying to remember how everything was connected, simply follow your documented setup.
7. Protecting Gaming Data During Relocation
Backing Up Important Game Saves
Before moving, back up important files and game saves where appropriate.
Cloud synchronization can provide additional protection, but users should not assume every file is automatically backed up.
Securing Cloud and Local Data
Check that important accounts remain accessible and that you know the necessary login credentials.
For locally stored files, maintain a separate backup whenever possible.
Checking External Drives and Storage Devices
External hard drives and SSDs should be protected from impacts during transportation.
Store them securely and avoid placing heavy equipment on top of them.
8. Transporting Your Gaming Equipment
Choosing a Safe Vehicle and Storage Position
Fragile gaming equipment should be positioned securely inside the vehicle rather than left where it can slide around.
Avoid stacking heavy objects on top of monitors or PC cases.
Avoiding Heat, Moisture, and Excessive Movement
Do not leave electronics exposed to extreme temperatures for extended periods.
Keep equipment dry and protected from sudden movement.
Handling Fragile Hardware During Transit
Drive carefully and minimize unnecessary movement. When possible, transport the most delicate components yourself rather than placing them among heavy household items.
9. Rebuilding Your Gaming Setup After Moving
Setting Up Your Gaming Desk
Start by positioning the desk and major equipment before reconnecting every accessory.
Consider monitor height, seating position, power access, and cable routes.
Reconnecting Hardware Correctly
Use your photographs and labels as references.
Connect major components first, followed by accessories and networking equipment.
Testing Devices Before Full Use
Turn on the system and test:
- Display output
- Keyboard and mouse
- Audio
- Internet connection
- Controllers
- External storage
Testing each component individually makes troubleshooting easier.
Restoring Your Original Gaming Environment
Once everything works, recreate your preferred monitor positions, lighting, speakers, accessories, and cable arrangement.
10. Optimizing Your New Gaming Space
Choosing the Best Desk Location
Choose a location with adequate ventilation and convenient access to electrical outlets.
Avoid positioning sensitive equipment where direct sunlight, moisture, or excessive heat could become a problem.
Managing Lighting and Room Layout
Good lighting can reduce eye strain and improve the overall atmosphere of your gaming room.
Position lighting so it does not create distracting reflections on your display.
Improving Cable Management
Use cable channels, clips, or reusable ties to keep wires organized.
A clean cable layout makes future maintenance and equipment changes easier.
Creating a Comfortable Gaming Environment
Consider ergonomics when rebuilding your setup. Your chair, monitor height, keyboard position, and mouse placement should support comfortable use during longer sessions.
11. Internet and Network Setup After Relocation
Reconnecting Your Gaming Devices
Reconnect your router and networking equipment before testing online games.
Make sure PCs, consoles, and mobile devices can connect successfully.
Testing Internet Speed and Stability
Run a reliable connection test and check for unexpected drops.
Remember that download speed alone does not determine online gaming quality.
Optimizing Wi-Fi or Wired Connections
A wired Ethernet connection can provide stable connectivity when practical. If using Wi-Fi, position networking equipment appropriately and minimize unnecessary interference.
Reducing Latency for Online Gaming
For competitive gaming, stable latency is often more important than simply having a very high download speed.
12. Common Mistakes to Avoid When Moving a Gaming Setup
Packing Equipment Without Labels
Unlabeled cables can turn a simple setup into a frustrating puzzle.
Forgetting Small Accessories
USB receivers, adapters, screws, and charging cables are easy to overlook.
Neglecting Data Backups
Hardware can be replaced; important personal files may not be recoverable. Always protect valuable data before moving.
Rushing the Reassembly Process
Trying to reconnect everything quickly can result in incorrect connections or overlooked problems. Take a systematic approach.
13. EuroGamersOnline Tips for a Stress-Free Gaming Move
Preparing Early
Begin planning several days before the move instead of packing everything at the last moment.
Keeping Essential Equipment Together
Keep critical gaming equipment in clearly identified containers.
Checking Hardware After Transportation
Inspect equipment for visible damage before powering it on.
Maintaining an Organized Setup
Once everything is rebuilt, maintain your cable labels and storage system so future upgrades become easier.
14. Frequently Asked Questions
How Do I Move a Gaming PC Safely?
Shut it down completely, disconnect accessories, protect the case from impacts, and pay particular attention to heavy internal components such as large graphics cards.
Should I Remove Components Before Transporting My PC?
For heavy components, removal can reduce stress during transportation, but it should only be done if you are comfortable handling PC hardware. Otherwise, professional assistance is advisable.
How Can I Protect My Gaming Monitor?
Use its original packaging when available, protect the screen from pressure, and keep heavy objects away from it during transportation.
What Is the Best Way to Organize Gaming Cables?
Label cables before disconnecting them and store them in separate, clearly marked groups based on the equipment they serve.
How Can I Restore My Gaming Setup Quickly?
Take photographs before disassembly, label connections, keep equipment organized, and reconnect the system in stages.
15. Conclusion
Key Steps for Relocating Without Losing Your Gaming Setup
A successful gaming move depends on preparation, organization, careful transportation, and systematic reconstruction. Creating an inventory, photographing your setup, protecting fragile hardware, labeling cables, and testing equipment after arrival can make the entire process significantly easier.
Protecting Hardware and Gaming Data
Your gaming setup represents both a financial investment and a collection of personal data. Proper packaging protects the hardware, while reliable backups protect valuable files and game progress.
Creating the Perfect Gaming Environment in Your New Location
Relocating does not have to mean sacrificing your gaming experience. With a structured approach, you can rebuild your setup efficiently and even use the move as an opportunity to improve your desk layout, cable management, networking, and overall comfort.
EuroGamersOnline provides a practical approach to moving your gaming setup without unnecessary damage, lost equipment, or reassembly confusion—helping you get back to gaming in your new space with confidence.