
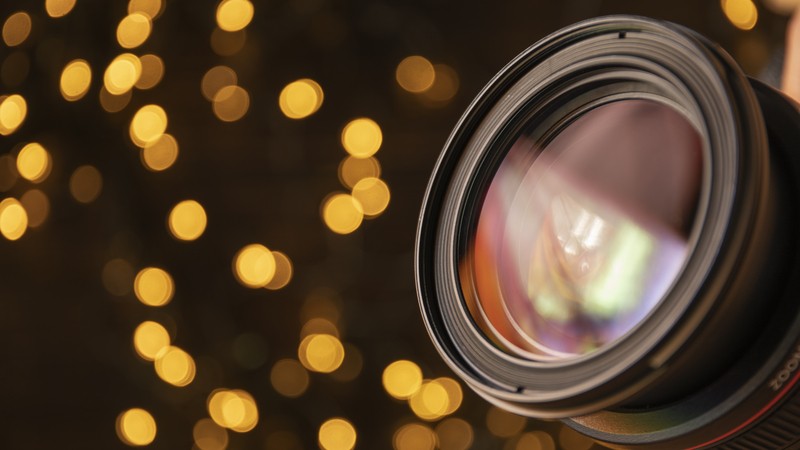
Photography is more than just capturing a moment—it’s about creating mood, atmosphere, and emotion through light and composition. One of the most powerful ways to add drama and style to an image is by using lens flare. Traditionally, lens flare occurs when light enters the camera lens at certain angles, scattering and creating glowing streaks or halos across a photo.
With the rise of photo-editing tools and plugins, photographers no longer have to rely solely on natural lighting to achieve this effect. That’s where Photeeq Lens Flare comes into play. As a digital editing feature, it allows photographers and designers to recreate realistic lens flare effects, enhancing images with professional-grade artistry. Whether subtle or dramatic, Photeeq Lens Flare offers endless creative possibilities.
What is Photeeq Lens Flare?
Photeeq Lens Flare is a specialized photo-editing effect designed to replicate the look of natural lens flare. It provides users with the flexibility to add or adjust light streaks, halos, and glows in a controlled environment. Instead of waiting for the perfect sunlight angle outdoors, photographers can simulate the effect during post-production.
Key characteristics of Photeeq Lens Flare include:
-
Customizable Intensity: Adjust brightness, glow, and opacity for subtle or bold results.
-
Directional Lighting: Position flare effects as if they’re coming from a light source, such as the sun or artificial lights.
-
Realistic Rendering: Advanced algorithms make the flares appear organic rather than artificial overlays.
-
Wide Application: Useful in portraits, landscapes, product photography, and digital art.
By giving photographers greater control over light, Photeeq Lens Flare turns ordinary images into striking works of visual art.
How Lens Flare Enhances Photography
Lens flare isn’t just a technical artifact—it’s a storytelling tool. When used thoughtfully, it can dramatically improve the atmosphere of an image.
1. Adds Emotion and Drama
Lens flare creates a dreamy, cinematic quality that enhances emotional impact. A wedding photo with subtle flare, for instance, feels warmer and more intimate.
2. Highlights Light Sources
By emphasizing the presence of the sun, street lamps, or studio lighting, lens flare adds realism to the scene. It mimics what the human eye naturally perceives.
3. Enhances Composition
Flares can draw attention to specific parts of the image, guiding the viewer’s eyes toward the subject.
4. Creates Visual Interest
Even in minimalist compositions, lens flare introduces layers of texture and depth, making the image more dynamic.
Photeeq Lens Flare provides photographers with the tools to achieve these enhancements without being limited by real-world lighting conditions.
Creative Uses of Photeeq Lens Flare in Images
One of the greatest advantages of Photeeq Lens Flare is its versatility across different genres of photography.
-
Portrait Photography: Add a soft golden glow behind subjects for dreamy outdoor portraits.
-
Landscape Photography: Enhance sunsets or sunrises with flares that emphasize the natural brilliance of light.
-
Street Photography: Create urban drama by adding flares to neon signs, headlights, or city skylines.
-
Product Photography: Highlight glass, metal, or glossy surfaces with subtle flares for a polished effect.
-
Digital Art: Designers often use lens flare in posters, advertisements, or cinematic art to create mood.
Creativity lies in experimenting with placement and intensity, turning Photeeq Lens Flare into both a tool and an art form.
Tips for Using Photeeq Lens Flare Effectively
While Photeeq Lens Flare offers creative freedom, using it wisely ensures professional results.
-
Keep It Subtle: Overusing lens flare can overwhelm the image. Small, soft effects often work better.
-
Match the Light Source: Always align the flare with the existing direction of light in the photo for realism.
-
Adjust Transparency: Lower opacity can make the flare blend seamlessly into the photo.
-
Experiment with Color: Warm tones (yellow, orange) often suit natural light, while cooler flares (blue, purple) fit futuristic or nighttime shots.
-
Use Layers: If editing in software with layers, keep the flare on a separate layer for easy adjustments.
Mastering these tips helps photographers achieve results that are both artistic and authentic.
Common Mistakes to Avoid with Lens Flare
Even with powerful tools like Photeeq Lens Flare, mistakes can reduce the quality of an image. Here are pitfalls to avoid:
-
Overuse: Too many flares make an image look artificial or distracting.
-
Incorrect Placement: Misaligned flares that don’t match light sources break the illusion of realism.
-
Ignoring Subject Clarity: A strong flare over a subject’s face can obscure details and ruin the shot.
-
Unbalanced Colors: Using flare tones that don’t complement the overall image may look jarring.
-
Neglecting Context: Not all photos benefit from lens flare—sometimes simplicity is more powerful.
Avoiding these mistakes ensures that Photeeq Lens Flare enhances rather than detracts from your photography.
Photeeq Lens Flare in Professional Photography
Professional photographers often rely on Photeeq Lens Flare to achieve cinematic results, especially when working under tight conditions.
-
Weddings: Subtle flares create romance and nostalgia in portraits or ceremony shots.
-
Fashion Photography: Dramatic flares add glamour, emphasizing lighting setups and stylish moods.
-
Commercial Photography: Flare effects help products appear polished, energetic, and visually appealing.
-
Film and Media: Movie posters and promotional content frequently incorporate lens flare for cinematic aesthetics.
For professionals, Photeeq Lens Flare is not just an editing effect—it’s a creative strategy to enhance storytelling.
Comparing Photeeq Lens Flare with Other Effects
Lens flare is one of many tools photographers use in editing. Here’s how Photeeq Lens Flare compares:
-
Vs. Filters: Filters change overall tone or mood, while flares add dynamic lighting elements.
-
Vs. Vignettes: Vignettes darken edges to focus on the subject; lens flares introduce light for a complementary effect.
-
Vs. Light Leaks: Both mimic light effects, but flares are sharper and more directional, while leaks feel diffuse.
-
Vs. HDR: HDR enhances details and contrast, while lens flares emphasize light interaction.
Photeeq Lens Flare stands out for its ability to create realism without overwhelming the image, making it a favorite among photographers.
Best Editing Practices for Photeeq Lens Flare
To maximize results with Photeeq Lens Flare, adopt professional editing practices:
-
Work Non-Destructively: Always edit on duplicates or layers to preserve the original photo.
-
Blend with Natural Light: Use flare only where light sources naturally exist in the scene.
-
Test Multiple Intensities: Apply different flare strengths, then choose the one that enhances rather than dominates.
-
Combine with Other Effects: Pair lens flare with subtle color grading for a cinematic finish.
-
Preview Across Devices: Check the final photo on various screens to ensure the effect looks balanced.
Consistency in editing practices ensures that your Photeeq Lens Flare images maintain a professional standard.
Conclusion: Transforming Photos with Photeeq Lens Flare
Lens flare is no longer just a happy accident of light—it’s a deliberate artistic choice. With Photeeq Lens Flare, photographers and designers have the freedom to experiment with light, emotion, and composition in ways that were once limited to natural conditions.
From enhancing portraits and landscapes to creating cinematic visuals for commercial projects, this tool empowers creatives to push boundaries. Used thoughtfully, it adds depth, mood, and storytelling to images, transforming ordinary photos into extraordinary works of art.
In the hands of a skilled photographer, Photeeq Lens Flare isn’t just an effect—it’s a gateway to more expressive, impactful photography.